How to Crop a PDF on Mac for Free

Summary :
This article shows you some effective ways to crop any PDF file on your Mac device.
In this article
Not sure how to crop a PDF on your Mac? This article covers a few easy ways to do it, using both built-in tools and free apps. Here’s a quick look so you can pick the one that works best for you:
• Preview App (free): Quickly crop PDF pages using the built-in Preview—no installation needed.
• Mac Screenshot Tool (free): Permanently crop a single-page PDF using macOS’s screenshot feature.
• PDFgear Online PDF Cropper (free): Instantly crop multiple pages in your browser—no file uploads required.
• PDFgear Mac App (free): Crop large PDFs offline while preserving full quality. It’s currently the No.1 PDF editor on the Mac App Store.
• Adobe Acrobat Pro (paid): Offers advanced cropping tools with customizable page margins across all PDF pages.
Using the Built-in Preview App
You know what? You can crop a PDF on your Mac without installing anything — just use the built-in Preview app.
Here’s how:
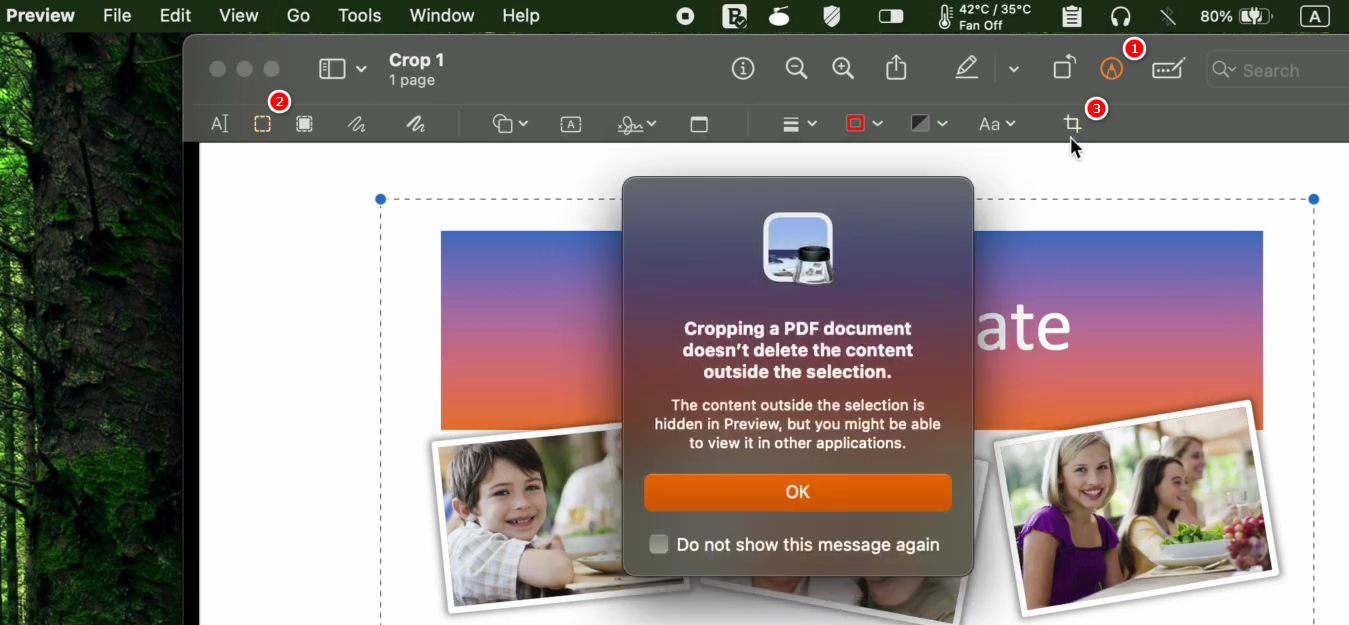
- Open the PDF with Preview.
- Click the pencil icon at the top to show the Markup Toolbar.
- Click the dotted rectangle tool and drag to select the area you want to keep.
- Go to the top menu and click Tools > Crop.
- Click File > Save or File > Export as PDF to save your cropped file.
You can undo the crop by pressing Command + Z right after cropping, or by closing the file without saving.
Crop PDF Preview
Tips to Keep in Mind
* Preview only crops one page at a time.
If you want to crop several pages the same way, you can:
– Repeat the steps manually for each page, or
– Use the thumbnail sidebar (View > Thumbnails) to select multiple pages by holding Shift or Command, then crop them all at once.
If that feels too complicated, try a dedicated PDF editor like PDFgear (free) or Adobe Acrobat (paid) to crop multiple pages more easily.
* Cropping in Preview is only visual.
The hidden area remains in the file, which is an industrial standard in PDF tools like Adobe Acrobat and PDFgear. For sensitive documents where content needs to be removed permanently, consider using the screenshot method, explained in the next section.
Using Mac’s Screenshot Tool
macOS’s built-in screenshot feature allows you to take screenshots of parts of a PDF to permanently crop the PDF file. But it has it’s limitation, you can only crop one PDF page at a time.
That’s how to use it:
- Open the PDF in Preview or any web browser.
- For macOS Mojave and later: press Shift + Command + 5. (For earlier versions: press Shift + Command + 4).
- Select the area you want to crop by dragging the cursor.
- The screenshot saves as a PNG image.
- Open this image in Preview, then choose File > Export as PDF to save the cropped portion as a new PDF.
It’s worth noting that, for a PDF that contains searchable text, this method will convert it into a flat image, meaning you won’t be able to highlight, copy, or search text afterward. What’s more, because it’s based on screenshots, quality may drop, especially for scanned PDFs or text-heavy documents.
Moreover, to ultimately get a multiple-page PDF, you’ll have to take screenshots repeatedly and then combine these screenshots into a PDF. For this, PDFgear’s image-to-PDF converter is recommended.
So, if you want to crop multiple pages and keep the text selectable (in a more convenient manner), make sure to try PDFgear online PDF cropper, discussed in the next section.
Using PDFgear’s free Online PDF Cropper
PDFgear offers a free and secure PDF cropper for you to instantly crop a PDF right within your web browser. With its batch cropping feature, you can resize all/several pages within a file simultaneously.
The steps are simple:
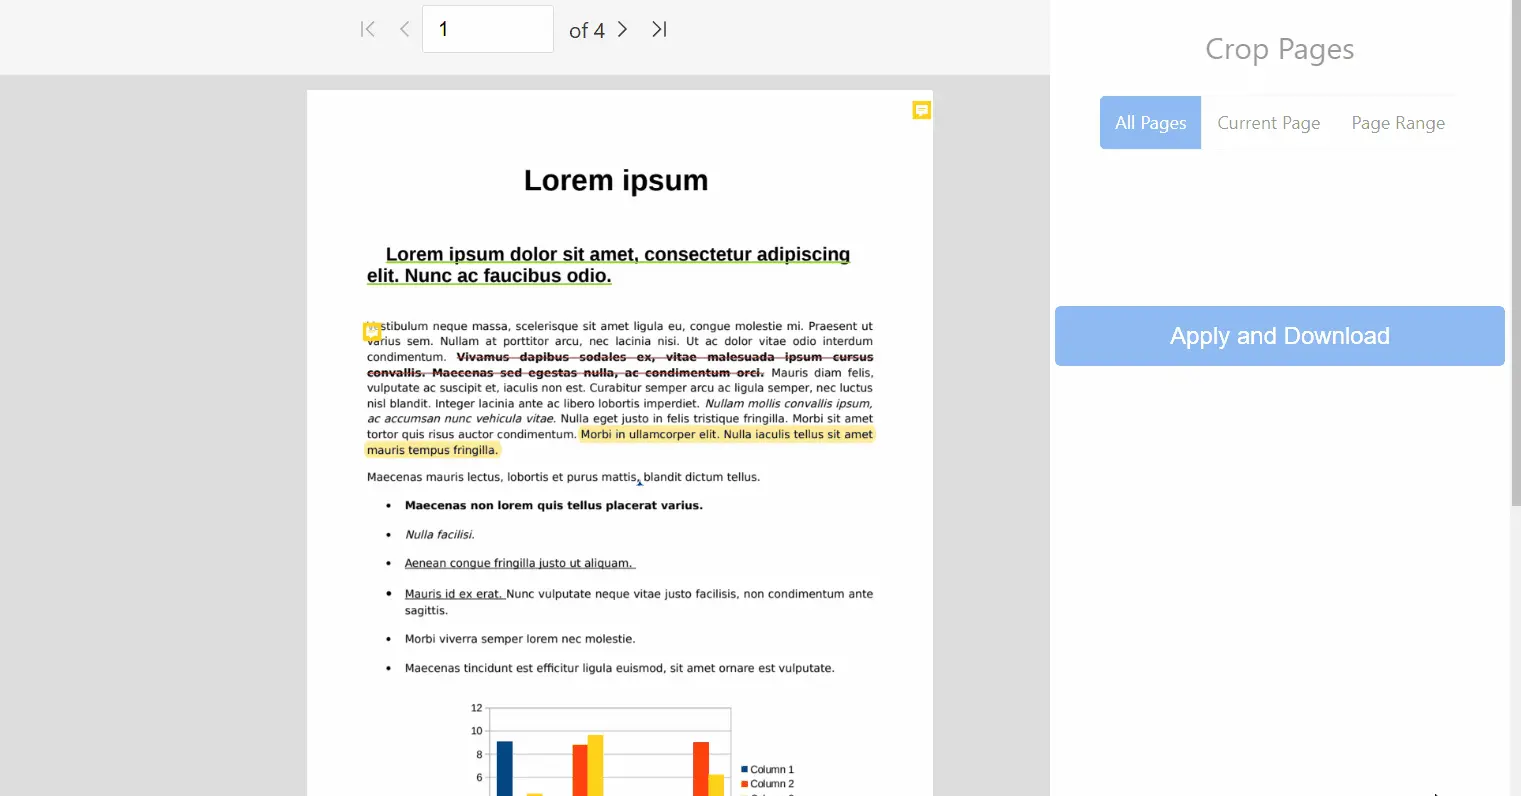
- Go to PDFgear online PDF cropper and open the PDF.
- Select the part of the PDF page you need.
- Select Current Page or set a Page Range to crop multiple pages.
- Click Finish to crop and download the PDF.
The reason PDFgear is highly recommended here is that it stands out from most popular PDF editors. Traditional online PDF tools like iLovePDF or Smallpdf use server-side processing, which requires users to upload their private documents to remote servers. PDFgear, on the other hand, uses client-side processing, ensuring that users’ files are never uploaded to any server, significantly enhancing privacy.
Another advantage of this approach is that PDFgear preserves selectable text and maintains the original PDF formatting. However, if you find the web app unstable when working with large PDFs or if you prefer to crop PDFs offline, the PDFgear Mac app is a better choice.
Using PDFgear’s Free PDF Cropper App
PDFgear is a free PDF cropping app available for macOS, it offers more control than Preview with batch cropping and maintains PDF quality.
How it works:
- Download and install PDFgear from the Mac App Store.
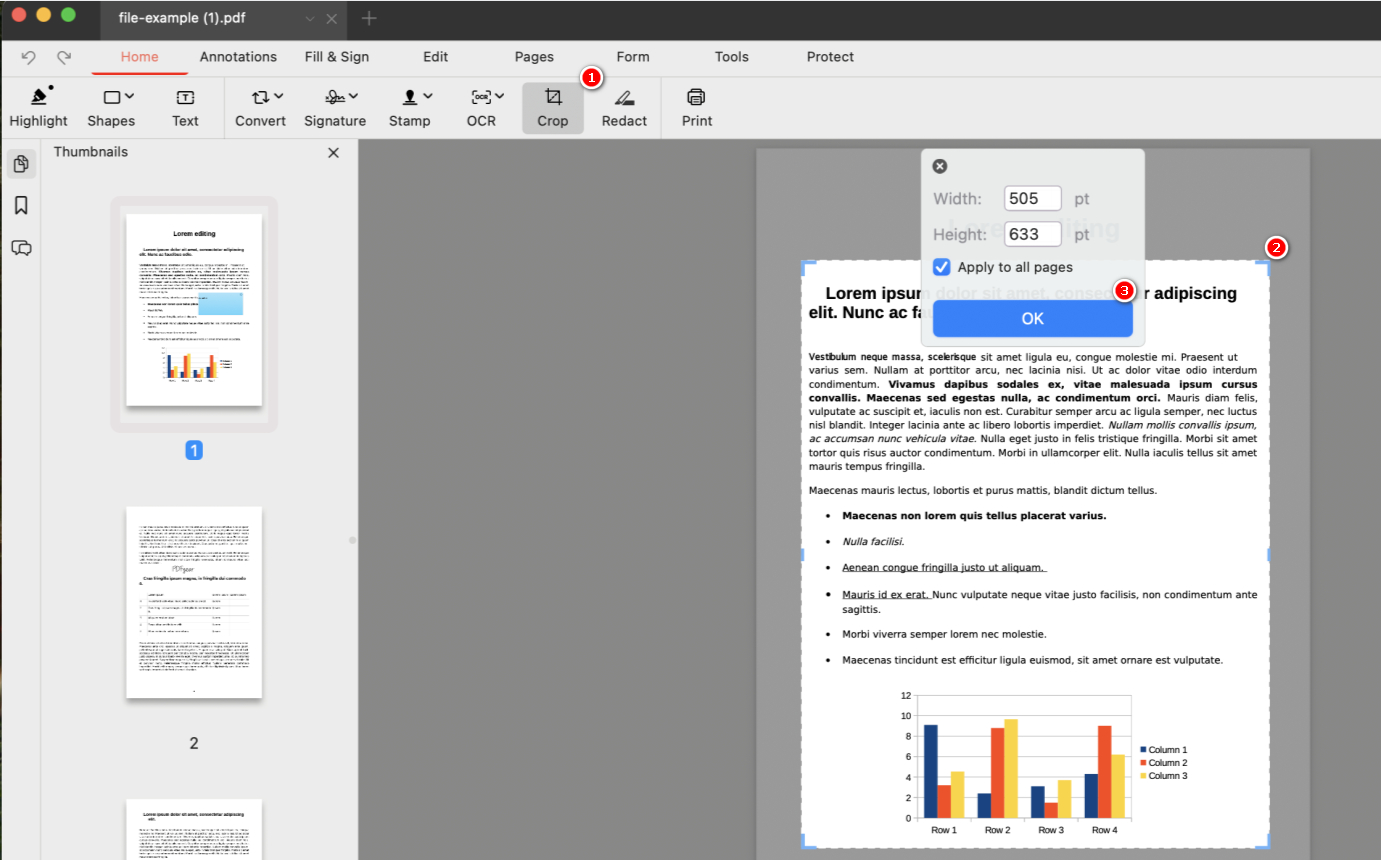
- Open your PDF in PDFgear.
- Use the crop tool to drag and adjust the crop rectangle.
- You can apply cropping to a single/multiple pages at once.
- Save the cropped PDF file.
Compared with the online version, the PDFgear macOS app works better with large or lengthy PDFs, and it helps maintain the original image quality and preserves searchable text and PDF structure. The PDFgear macOS app is quite impressive, isn’t it?
But if you’re an Adobe Acrobat Pro subscriber already, we’ve also got a guide for you. The next section will show you how to crop a PDF on a Mac using Adobe Acrobat.
Using Adobe Acrobat Pro DC
The popular Adobe Acrobat allows you to crop a PDF in its Pro version. It gives you full control over crop boxes — great for aligning margins, trimming whitespace, or standardizing layouts across all pages.
Steps:
- Open the PDF in Adobe Acrobat Pro.
- Go to Tools > Edit PDF.
- Click Crop Pages (looks like a crop tool).
- Drag to select the crop area, double-click to finalize.
- Set margins and apply to selected or all pages.
- Save the file.
Paid version required, but offers a trial.

Adobe Acrobat is worth a mention here for its unique features. First of all, it allows you to apply cropping to all pages at once using exact margin settings. Secondly, Acrobat can intelligently detect content boundaries in scanned pages, making the cropping more accurate and automatic.
That’ll be all of the methods for crop PDFs on Mac here. If you encounter any issues when cropping your PDF, scroll down to the FAQs section to troubleshoot common cropping issues.
FAQs
What is the shortcut to the Crop button in Preview on Mac?
To use a keyboard shortcut to crop a PDF on Mac using Preview, go to Tools, and press Command + K on the keyboard.
Why doesn’t the cropping apply to all pages?
That’s because Preview on Mac crops only the selected page(s) by default. Use the thumbnail sidebar (View > Thumbnails) to select multiple pages at once by holding Shift or Command and then crop them all together.
Why does the cropped area return after saving and reopening the PDF?
Because Preview often applies a temporary “mask”, not a true crop. The hidden content is still part of the file. To permanently crop a PDF, you can use macOS’s unbuilt screenshot feature (Shift + Command + 5 on the keyboard).
Can I crop multiple pages of a PDF at once in Preview?
Go to the thumbnail sidebar (View > Thumbnails) to select multiple pages by holding Shift or Command. Then repeat the cropping steps. You can also use PDFgear online PDF cropper for batch cropping.
Why is the crop tool grayed out in Preview?
This usually happens if:
– No selection has been made.
– You’re not on a single-page view.
– The PDF is password-protected.
Why are the margins uneven after cropping the PDF?
That’s because the pages may have different original sizes or scanned content that isn’t perfectly centered. To fix that, use batch alignment in apps like Adobe Acrobat Pro, which allow setting uniform crop boxes.
Why is the quality poor after cropping scanned PDFs?
Cropping a scanned image can degrade quality if the file is re-compressed poorly. Use high-resolution scans from the start, or choose “Best” or “High” quality settings when exporting from Preview.